gopigo

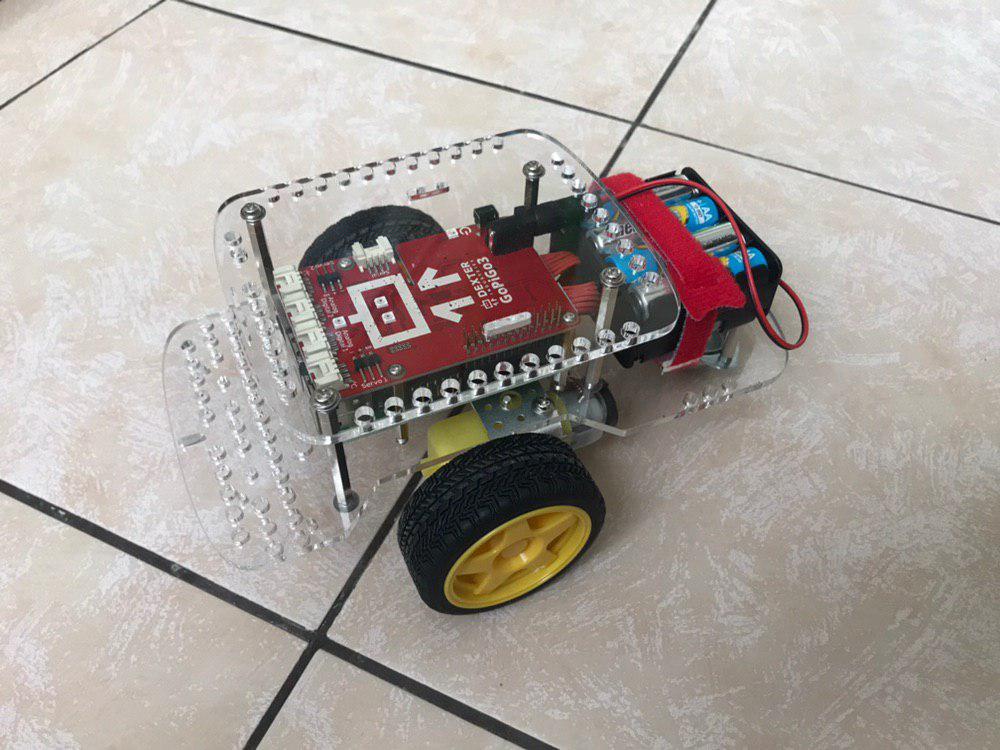
GoPiGo is a really nice robot that you can build by your own. It’s inexpensive and a good starting point when learning robotics. First you need to assemble it by your own and install Raspbian for robots (a modified version of Raspbian OS for GoPiGo). With a help of step-by-step instructions it would be an easy deal. Once assembled you can use Python to program it. Usually you need to be remotely logged in and launch your script from remote terminal, so in this article we’ll be exploring another approach using remote procedure call. Thankfully Python has its builtin module for that, so implementing RPC client/server is an easy task.

Creating a server

First we need to define our server: it’s a set of methods it can perform and which will be exposed for our client. Which methods should be exposed? Those could be anything you want but we’ll start with implementing basic movements in all the directions and setting a desired speed.

1
2
3
4
5
6
7
8
9
10
11
12
13
14
15
16
17
18
class GoPiGoController(object):
def forward(self):
pass

def backward(self):
pass

def left(self):
pass

def right(self):
pass

def stop(self):
pass

def set_speed(self, value):
pass

Next we create and instance for our server which will listen for incoming requests

1
2
3
4
5
6
7
8
9
10
11
12
13
from xmlrpc.server import SimpleXMLRPCServer
from xmlrpc.server import SimpleXMLRPCRequestHandler

class RequestHandler(SimpleXMLRPCRequestHandler):
rpc_paths = ('/RPC2',)

HOST = '0.0.0.0'
PORT = 8777
server = SimpleXMLRPCServer(
(HOST, PORT),
requestHandler=RequestHandler,
allow_none=True,
)

Now we need to specify which exact methods should be triggered on incoming requests. We are able to register all the methods for our class with at once using register_instance.

1
2
3
server.register_introspection_functions()
controller = GoPiGoController()
server.register_instance(controller)

Finally, we launch our server and wait for some client to reach us.

1
2
3
4
5
6
7
8
import sys
print('Serving XML-RPC on {host}:{port}'.format(host=HOST, port=PORT))
try:
server.serve_forever()
except KeyboardInterrupt:
print("\nKeyboard interrupt received, exiting.")
server.shutdown()
sys.exit(0)

Creating a client

Implementing a client is much simpler though we’ll add some complexity because of using Tkinter (make sure your Python support it following the instructions INVALID POST SLUG PROVIDED ).

1
2
3
4
5
6
import xmlrpc.client

HOST = 'dex.local'
PORT = 8777
s = xmlrpc.client.ServerProxy('http://{host}:{port}'.format(host=HOST, port=PORT))
s.forward() # the method with the same name will be invoked on our server

While it does nothing we can implement a primitive gui for our client

1
2
3
4
5
6
7
8
9
10
11
12
13
14
15
16
17
18
19
20
21
22
23
24
25
26
27
28
29
30
31
import os
import tkinter as tk
from functools import partial

class Application(tk.Frame):
def __init__(self, s, master=None):
super().__init__(master)
os.system('xset r off')
self.s = s
self.master = master
self.master.geometry('300x200')
self.master.resizable(0, 0)
self.pack()
self.master.title('GoPiGo Controls')
self.create_widgets()
self.bind_controls()
self._flashing = False
self._lights = False

def __del__(self):
os.system('xset r on')
self.s('close')

def create_widgets(self):
w2 = tk.Scale(self.master, from_=0, to=500,
tickinterval=100, length=300, orient=tk.HORIZONTAL, command=self.set_speed)
w2.set(300) # default speed
w2.pack(side='top')
self.quit = tk.Button(self, text='exit',
command=self.master.destroy)
self.quit.pack(side='bottom')

It consists of a master window, scale slider (for setting speed), quit button, two boolean flags (responsible for lights being turned on/off and flashing in random order) and s field which holds a connection to our server. We then bind keyboard buttons to control ours robot movements with bind_controls method.

1
2
3
4
5
6
7
8
9
10
11
12
13
def bind_controls(self):
self.master.bind('<KeyPress-w>', partial(self.wrap_event, self.s.forward))
self.master.bind('<KeyPress-s>', partial(self.wrap_event, self.s.backward))
self.master.bind('<KeyRelease-w>', partial(self.wrap_event, self.s.stop))
self.master.bind('<KeyRelease-s>', partial(self.wrap_event, self.s.stop))
self.master.bind('<KeyPress-a>', partial(self.wrap_event, self.s.left))
self.master.bind('<KeyPress-d>', partial(self.wrap_event, self.s.right))
self.master.bind('<space>', self.flash)
self.master.bind('<KeyPress-l>', self.lights)

def wrap_event(self, function, event):
print(event)
function()

And there is a callback for setting a speed (it got triggered when you change a value on a slider)

1
2
def set_speed(self, value):
self.s.set_speed(value)

The only thing left is to implement logic behind states of our LEDs.

1
2
3
4
5
6
7
8
9
10
11
12
13
14
15
16
17
18
19
20
21
22
23
24
25
26
27
28
29
def flash(self, event):
if self._lights:
print('Cannot flash when lights is on!')
return

if self._flashing:
self._flashing = False
self.s.stop_flash()
print('Stop flashing')
return

self.s.start_flash()
print('Start flashing')
self._flashing = True

def lights(self, event):
if self._flashing:
print('Cannot turn lights on when flashing!')
return

if self._lights:
self._lights = False
self.s.turn_lights_off()
print('Lights is off')
return

self.s.turn_lights_on()
print('Lights is on')
self._lights = True

Basically we use our boolean flags to represent current state for lights which behaves like semaphore in order to comply to an action only if possible.

Now we can launch main loop of our application which will listen to any key events and in case of a match will invoke corresponding method on the client.

1
2
3
4
5
6
root = tk.Tk()
app = Application(s=s, master=root)
try:
app.mainloop()
finally:
del app

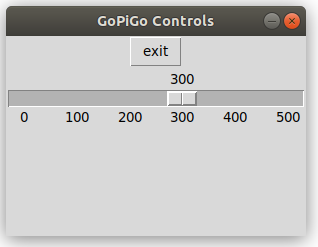
Note that we added a cleanup stage within finally block which will close a connection and reset autorepeat to default value. After launching you should see a window similar to this one

client gui

Implementing controller methods

Now we are ready for the best part: making our robot actually move. In order to do that we need to use easygopigo3 library which has an API with all the available controls.

1
2
3
4
5
6
7
8
9
10
11
12
13
14
from concurrent.futures import ThreadPoolExecutor
from easygopigo3 import EasyGoPiGo3 # importing the EasyGoPiGo3 class

class GoPiGoController(object):
def __init__(self):
self.gpg = EasyGoPiGo3() # instantiating a EasyGoPiGo3 object
self.flashing = False
self.executor = ThreadPoolExecutor(max_workers=1)
self.executor.submit(self.flash_lights)

def cleanup(self):
print('Cleaning up...')
self.executor.shutdown(wait=False)
self.stop_flash()

All the underlying control methods are only a light proxies to gpg object itself.

1
2
3
4
5
6
7
8
9
10
11
12
13
14
15
16
17
def forward(self):
self.gpg.forward()

def backward(self):
self.gpg.backward()

def left(self):
self.gpg.turn_degrees(-90)

def right(self):
self.gpg.turn_degrees(90)

def stop(self):
self.gpg.stop()

def set_speed(self, value):
self.gpg.set_speed(value)

There is one tricky part though which requires imported above futures module. In order to make our lights blink we need continuously turn them on and off. This will block the rest of the code, so we need a dedicated thread which will do that in the background. Let’s see how it works

1
2
3
4
5
6
7
8
9
10
11
12
13
14
15
16
17
18
19
20
21
22
23
24
import time
import random

FLASH_DELAY = 0.1 # in seconds

def flash_lights(self):
gpg = self.gpg
led_triggers = (
(gpg.open_left_eye, gpg.close_left_eye),
(gpg.open_right_eye, gpg.close_right_eye),
(partial(gpg.blinker_on, 0), partial(gpg.blinker_off, 0)),
(partial(gpg.blinker_on, 1), partial(gpg.blinker_off, 1)),
)
leds = len(led_triggers)
flags = [False] * leds
while True:
if self.flashing:
led = random.randrange(0, leds)
action = not flags[led]
flags[led] = action
led_triggers[led][action]()
time.sleep(FLASH_DELAY)
else:
time.sleep(1)

First we define all the available methods for turning a particular led on and their counterparts. After that we create a list of flags storing information about which led is active at the moment. Then within given interval we randomly toggle a state of one of them which creates a blinking effect.

Turning all the lights on is much simpler (the client code is responsible for not turning the lights on when flashing is in progress, no additional measurements was done on this side)

1
2
3
4
5
6
7
8
9
def turn_lights_on(self):
self.gpg.open_eyes()
self.gpg.blinker_on(0)
self.gpg.blinker_on(1)

def turn_lights_off(self):
self.gpg.close_eyes()
self.gpg.blinker_off(0)
self.gpg.blinker_off(1)

But how does our background thread know when to start flashing? We use our self.flashing flag for that. It just periodically checks whether a flag is enabled and it can be enabled via exposed methods start_flash and stop_flash.

1
2
3
4
5
6
def start_flash(self):
self.flashing = True

def stop_flash(self):
self.flashing = False
self.turn_lights_off()

I guees that’s it. Now launch python3 server.py on your RaspberryPi and client on your laptop (python3 client.py) and you are ready to navigate your robot around the world.

Nice work!

To see how it works altogether click Play on the video below.

Resources